Waiting for UPS sucks. Here are some things I did while I waited: went to work, cleaned the house (OK picked up some...) thought about doing laundry, watched TV, ate breakfast AND lunch, and checked to see if Mr. Brown had been here yet. Come on, I was getting new toys to play with AND it was during the summer where work is slim until school starts up again in the fall, so new toys weren't supposed to be an option for me!
Finally, after I had decided that he just wasn't coming and I would be driving to the UPS center tonight after they were done with their rounds because there was no way any sane person would choose to drive down our road that is completely torn up and littered with big sewer pipes EVERYWHERE! Not to mention the construction crews who I think get a kick out of watching me maneuver my van through their obstacle course that changes every day! When I had lost all hope of being able to play this afternoon, my wonderful husband comes back inside with a box and announces "Happy Birthday!" I screamed in joy, scared the crap out of the cat and....well you know the rest.
Soooooo........Rick goes off to band practice and I sit down to play with my new toys.....
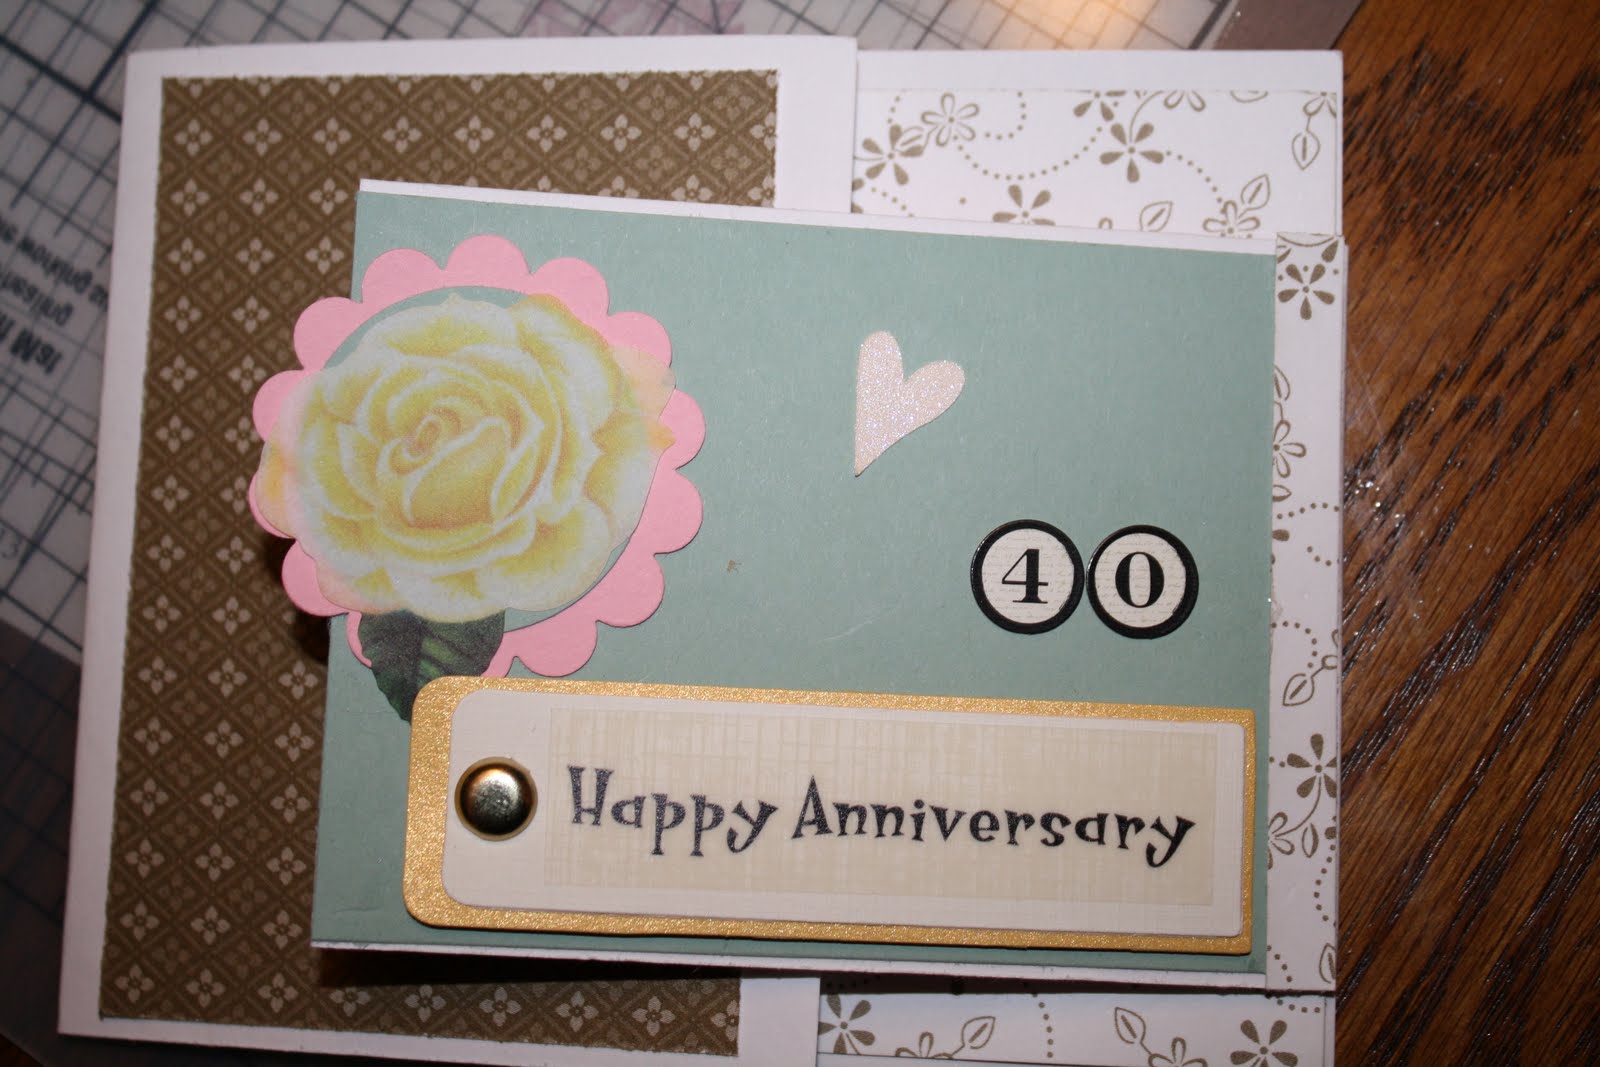
The image is from the
Summer Mini catalog, and the embossing folder is
Vintage Wallpaper from the NEW CATALOG! I used the
Two Way Glue pen and
Dazzeling Diamonds to ad some sparkle to the sash on the dress, and then layered the
Whisper White cardstock with a retired
Cameo Corral to match the marker color in the dress.

Holy moley are there a TON of pieces in this new set!
Awash With Flowers has 18 pieces to be exact and the clear mount set comes in two of the DVD-style cases to hold all those pieces! The punch is the Ornamant Punch that carried over into the new catalog. I first ran it through the Sizzix Big Shot with the Embossing Folder and then cut off the tip of the ornamant.
The DSP is from the Summer Mini catalog, Tempting Turquoise ink, Teeny Tiney Wishes, and the Word Window round out the list of items used to create this card. I love love LOVE this DSP and definately need to get another pack (or two or three) before the Summer Mini goes away at the end of August!

And finally, the last of my playing for the night (I think.) Again, I used Awash With Flowers. This time, I stamped the image in retired color Creamy Caramel and then used the Blender Pen to pick up Melon Mambo and "paint" the flowers. I cut out the Whisper White paper using the Top Note die for the Big Shot and layered it on some more retired cardstock that I embossed with the new Vintage Wallpaper embossing folder. Lastly, I made a point of putting Clear Block B in front of the card, check out the curves of the finger grooves! Later, there will be a side by side picture to compare these amazing blocks to the other ones in the stores, you know, the ones with the sharp corners that you cut your fingers on? Yep, got two of those today and absolutely NEED the rest of them, well maybe two more! So do you have a favorite? Are you inspired? Please call me or e-mail me for ordering information, I would love to help you get started! :)


 This set is new to me, called Upsy Daisey. I decided I had to have it after playing with My Digital Studio. Let me take a minute to tell you one of the many reason I love this amazing software- you get ALL of the Stampin Up stamp sets from the main catalog, ALL of the ribbons, ALL of the punches, ALL of- well lets just say you get EVERYTHING. Downloads are available for purchase as well so that you can ad various stamp sets and DSP that came out later from some of the mini catalogs. Anyway, so after designing my blog heading I had to have this stamp set! Stamped the main image and sentiment in the new Brilliant Blue ink color, cut out with the Top Note die on the Sizzix Big Shot, added a scrap of paper I had laying around and voila!
 Holy moley are there a TON of pieces in this new set!


 I don't have the "good" camera today,
 So simple! Took the Ornament Punch, cut off the tip, cut strips of paper for the stems, a sentament in Tempting Turquoise from the Oval All stamp set, punched out with the Oval Punch and then layered on a punched out piece using the Scalloped Oval Punch.
 All Paper is the DSP set Island Oasis from the summer mini catalog. Also used the Crop-A-Dile to make the holes for the ribbon.